Progress update: February 20th
I have installed the structure inside the clock as well as a remote controlled puck light installed in the top to cascade light down through the piece and create shadow. I also brought the origami piece closer to the laser cut piece so the viewer could view the bottom a little better.


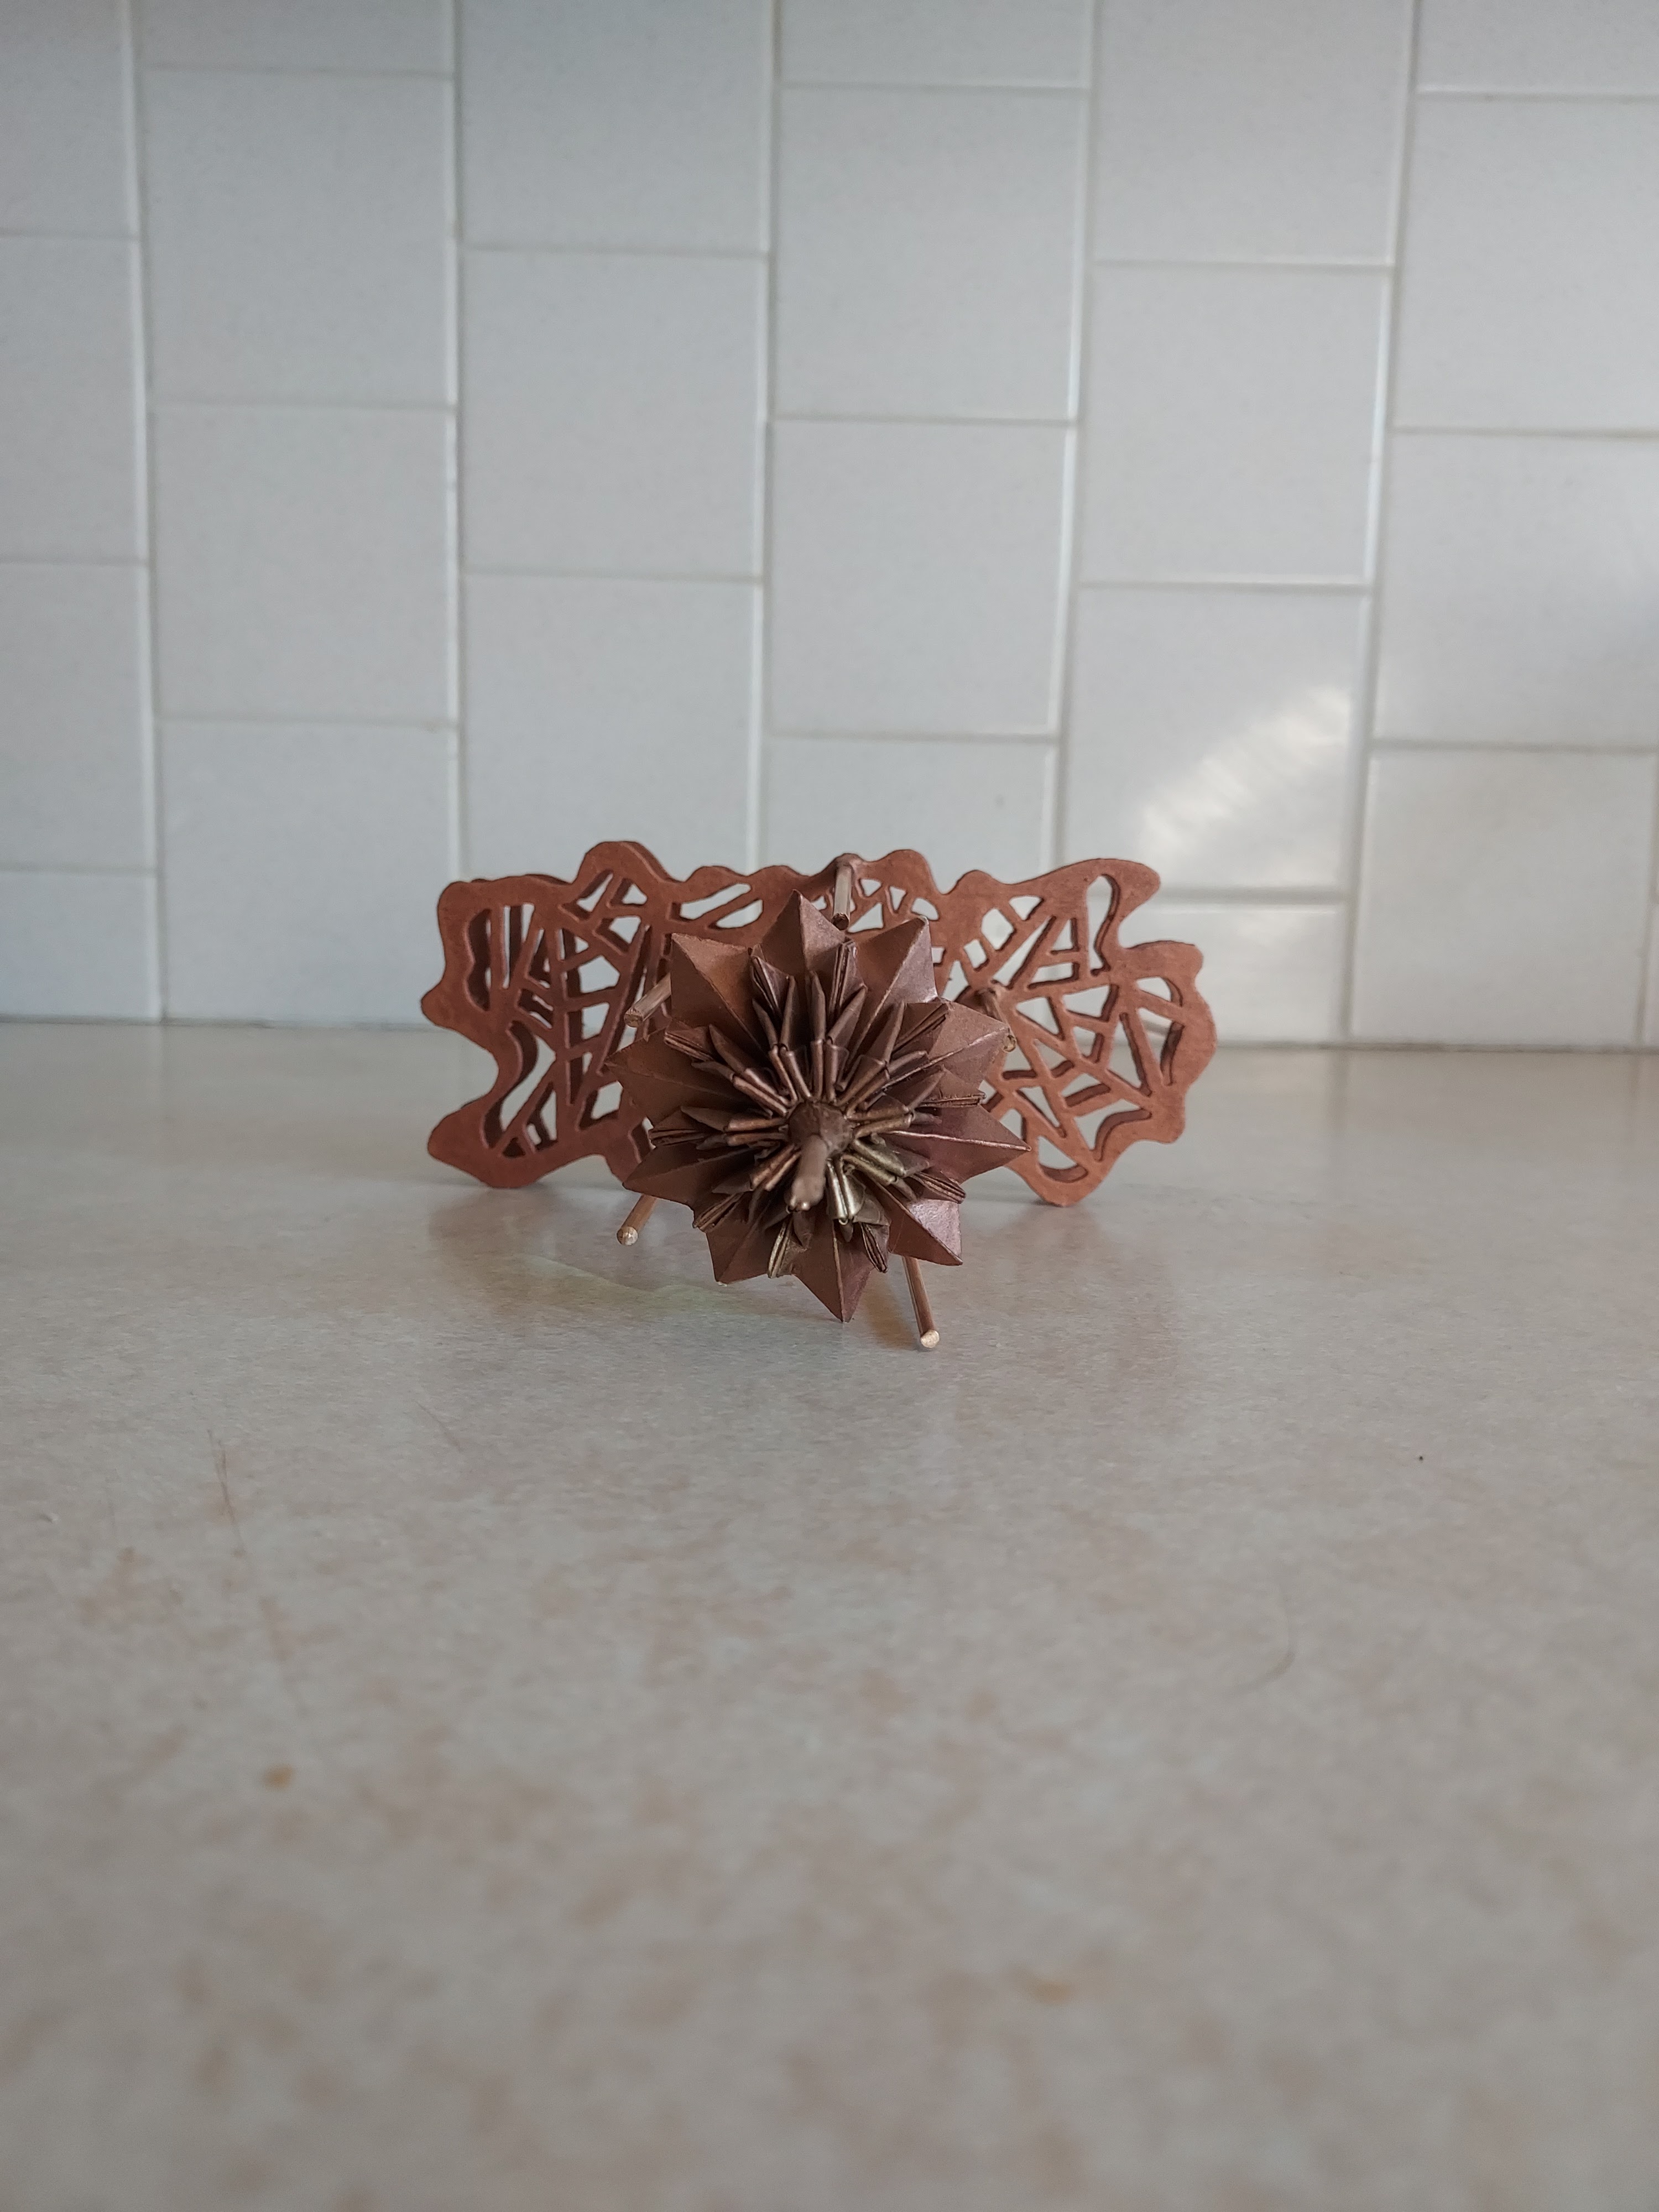
Progress update: February 13th, 2023.
I have completed the structure. All I really have left to do is to install lights into the top of the clock space. I would like to get one of those kits that Ashley has and wire it in. With the light shining downward from above, it will cast shadows down through the laser cut pieces, which I think will have a very interesting effect on the "floor" of the clock and potentially even the "walls". I then need to figure out how to mount this into the top of the clock's "ceiling.". I had an idea of cutting two small, square shaped pieces of thin wood to give some structure and drilling holes into it for the top rods to be fixed into with glue. Then I would be able to mount the system to the "ceiling" more easily and hopefully it would hold up better than trying to glue the rods to the "ceiling."
I was considering cutting a piece of paper to be fixed in-between the two laser cut planes. It would help conceal the tops of the rods that stick out in-between here. I am not sure how necessary this is. As the actual viewer, it may be seen from the opening in the clock, however, the ideal viewer in the sense of this being a gallery space, would view this from the "floor" looking upward and these mechanisms would not be seen from this perspective. For the sake of the true viewer, I think it may be a good idea to conceal this, and for the sake of a finished and clean look.
My concept of this was to implement light into this. However, after fiddling with my design a bit. I decided to ultimately omit the drilled holes in my original design and instead used the laser cutter to create more intricate cut outs in the planes. This opened up the idea to instead install lights in the top to create cast shadows. My idea was to create an abstract and angular sort of chandelier. While assembling the design, I opted to hang the origami (mock chandelier) piece lower than in my sketches. I think this allows for more cast shadows from above, and it just had a better visual aesthetic placing it below the chime rods that encircle it. As the ideal viewer, I think this would bring the piece much closer to them, making the origami feel bigger and more profound. I would also like to get a small figurine/figurines to place on the "floor" of the space to give reference to scale but also to show the viewer the ideal perspective of this installation.
I was really happy with how the spray paint application turned out here. My only qualm with the paint job was that the laser cut pieces were cut from chipboard so there is so texture that I think pulls these pieces away from the illusion of this structure being metal. It's not super noticeable, but if anyone has any suggestions on how to make the surface smoother, I would be open to trying them. If not, its a very minor flaw and doesn't distract from the piece too much. You honestly have to be looking quite closely to notice a pilling sort of texture on it.


For this piece I drew off of a piece by Cildo Meiereles called Mission/Missions or Missao/Missoes.
What is this piece about?


I really loved the golden aura it exudes. I wanted to implement this into my own piece and play with light in a similar way to this.
What does this piece communicate?
Here is my general design. It features a sheet of cut metal with cutouts and drilled holes which will be used to install the fairy lights into. What could you use besides fairy lights? This cheapens the design/form. There will also be drilled holes to install the rods I recovered from the chime mechanism that I removed from the inside of the clock. I thought it would be interesting to include these as a found object.
The sheet will be cut from 24 gauge copper. The origami figure is a modular piece fit together using 4 different modules and structures. Two of the 4 would be colored a different darker color for contrast. I would like to spray paint the other pieces to look copper and blend with the sheet metal. and spray paint the others to look like a metallic black.
The piece will be suspended from the "ceiling" with copper wires and the origami suspended from the sheet metal with copper wiring as well.
I plan to make the origami figure much smaller. this was just a prototype and for experimental purposes to find a form I liked.


For this project, I explored the concept of time, due to my object being a clock. I wanted to run with this to create a narrative.
My concept follows this idea that while time continues on, I feel that we as humans perceive and recount time through written record. History has been accounted through many forms: i.e. hieroglyphs, cave paintings, scrolls, tablets, books, and more. I decided to run with books for two reasons.
1) I was inspired by Sue Blackwell's incorporation of books in her work.
.jpeg)
.jpeg)
.jpeg)
I found her work whimsical and that it created a narrative of a book coming to life.
2) I picked up bookmaking as an art form while living in Salt Lake City. So, I was draw to this idea as a form of sculpture and installation.
For my first piece, I wanted to create a tree out of wire, preferably to match the hue of the metal in the clock. And I wanted to do a sort of reverse of Sue Blackwell's work by having a tree with books for the leaves. As if the tree is growing them.
I also liked the idea of the tree because trees take so long to grow and this would support my concept of time.


